Showing posts with label homecooking. Show all posts

Sunday, December 4, 2011

Chocolate Delight!

I really have to brag on my husband (hope you don't mind) and thought I would share this. Earlier today, Bill made an 11 layer cake with each layer brushed with a simple syrup, then with a layer of chocolate mousse. The outside has milk chocolate frosting and the sides covered with cake crumbles. I gained 20 pounds just looking at it!

OH MY.........!!!


This cake was kind of inspired by a show on the Food Network called, "The Best Thing I Ever Ate", and one of the features was a chef who made a 27-layer cake with a chocolate ganache and it was incredible. Of course we don't have the fancy pans and equipment that guy did, but I figure this will be a HUGE hit at my husband's job. They're having a cooking contest later this month and even if this cake wins, Bill said he would defer the prize to someone else since he's the boss. He just wanted to enter it to see how it would do.
Bill's a fabulous cook to begin with, and this time he's hit a home run!  

Another Family Favorite.......Goulash

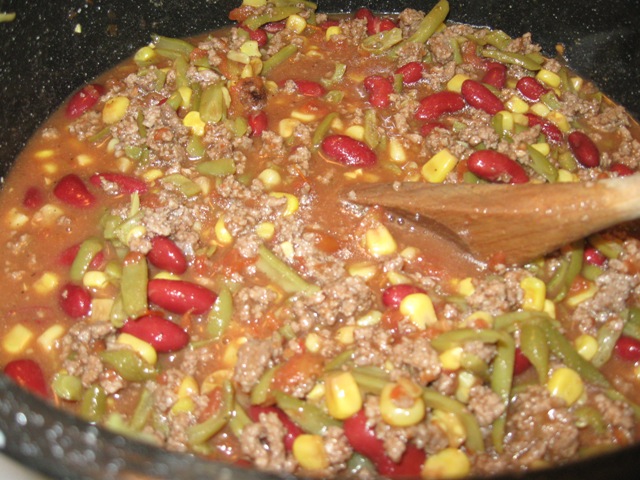
I don't remember exactly how I came up with this recipe, but I've been making it for years and everyone loves it. It's not really a traditional goulash as you might be used to, but I suppose it's close enough! I will warn you though, this makes a BIG batch of goulash. Even when I was feeding 7 of us we still had a lot leftover but it does freeze well, so you can get more than one meal from it.
I like this recipe because it's inexpensive and quick to make. You can serve it with crackers, corn bread, a loaf or garlic bread, or just as is. I will apologize for some of the measurements because this is one of those things where I add spices to my taste, but when I made this last night I tried to pay attention to how much of each I was adding. Taste this as you go and make this how you like it.

Goulash


3 lbs. ground beef, or you can also use ground venison, elk, etc.
1 large can crushed tomatoes, or if you like the diced variety you can use them instead
2 cans green beans (I use the french cut)
2 cans dark red kidney beans
2 cans corn
2 packages of brown gravy mix
1/2-1 tablespoon garlic powder
2 teaspoons black pepper
sea salt, to taste or optional
2 heaping tablespoons dried parsley
1 small box elbow macaroni noodles

In a large stock pot, start browning the meat. When done, drain and return to the pot on medium heat. In another pot, get your water boiling for the macaroni noodles. Cook those, drain and set aside.


Begin adding (including all the liquids) the crushed tomatoes, green beans, kidney beans, and the corn.


Stir well.

Next, add your seasonings, making sure you stir these in well, tasting as you go. Add the 2 packages of brown gravy mix and stir in. As I said earlier, I tried to pay attention to the amounts of the seasonings so start out with a little and as the goulash cooks, give it a stir and taste again. When you get it to your liking, turn the heat down to a low simmer, stirring occasionally.
Next, add the macaroni noodles and stir them in. Turn off the heat and let the goulash sit for 10-15 minutes.

 It's ready to serve!

That's it! A nice, hearty meal that's easy on the budget and wonderfully warming on those cold winter evenings.


This post is part of the "On My Mind" feature at Down To Earth 

Saturday, December 3, 2011

An Early Start!

I can't remember the last time I actually slept through the night and got some honest, restful sleep and this morning was no exception. I woke up because my left knee hurt like I had hyper-extended it or maybe I was just sleeping in an awkward position, so I got up. I suffer from Fibromyalgia, so I often wake up a number of times through the night due to pain, and usually it's a matter of rolling over in bed and then it's off to sleep again. Generally if I actually get up, it's to get something to drink and then I climb back in bed, but once in a great while I may get up around 3am and I'm UP. This morning I woke up at 12:30!
Anyhow, I've done a bit of cleaning up in the kitchen, made a pot of coffee, have more laundry going, bread dough rising, and now I'm here. My husband, Bill, got up briefly and came out of the bedroom looking at me rather confused, asking how long I'd been up and chuckled slightly when I told him and what I've been doing. Bless his heart, I know he worries about me, but he's used to all of this and knows when I get tired enough later in the day I'll lay down.
I had posted a while back about making your own laundry powder, and I've been very pleased with it. It's not hard to make, it's quite inexpensive, and it doesn't take much time to put together. But I've been curious about the liquid version and think I might make a batch either later today or tomorrow and see how I like it. Another reason I want to do this is to try it as a stain remover for laundry, and as a base for a household cleaner I read that Rhonda posted over at her blog, Down To Earth. If you're interested, the recipe for her liquid laundry soap is here. Just remember that if you try any of her recipes and like them, please let her know, and if you mention or post them on your blog please let folks know where you got it from. I know.......there are so many cleaning recipes out there on the internet but I'm a firm believer in giving credit where credit's due. Thanks.
Time for me to jump off of here for now, but I promise I will revisit the liquid laundry in another post and try to include some pictures to go along with it as well.
Have a great day!  

Thursday, November 3, 2011

Breakfast Burritos

A while back when my husband and I were in Arizona for a General Manager's conference he was attending, we stopped at a little place in the airport on our way home and bought a couple breakfast burritos. I'd really never had one before and didn't know if I'd like it but we were so hungry and for $5.00 we figured it was worth trying. I'm not sure about everything that was in them, but I do know there was scrambled eggs, chorizo sausage, rice, and maybe some onions or bell pepper. They were absolutely delicious!
I've fixed something similar a few times after that and everyone liked them, so I thought maybe if I make a few up and freeze them, it would be a quick and yummy breakfast break from cereal, especially now that the weather is getting cooler. So last night I made up a batch and I'd like to share the recipe with you.
These aren't expensive or hard to make, and the most time you'll spend on them is cooking the ingredients and letting it cool.

Breakfast Burritos

2 packages small tortillas or wraps (you might just need one package, but it's good to have extra)
1 small package of frozen hash brown potatoes, plain or with added onion and bell pepper
2 small tubes of beef chorizo sausage, our Walmart has these over in the refrigerated section with other Mexican foods.
8 eggs, beaten
1 package shredded cheese (mild, sharp, pepper jack.......whatever you like)
salt, pepper, and garlic powder to taste

In a separate pan, cook the chorizo sausage. Drain in a fine-mesh strainer, and set aside. Just a quickie note: I say use a fine-mesh strainer because when the chorizo is cooked it's very fine and if you use a regular colander, you'll lose a lot of meat! If you don't have a strainer, just put a paper towel in your colander and that'll work just fine.


In a second pan, add a couple tablespoons or so of vegetable oil and a couple pats of butter. Let the pan heat up, then add your potatoes. Add seasonings.


Allow to cook and brown, then turn the potatoes over to brown slightly on the other side. After a few minutes, add beaten eggs. Just before the eggs are fully cooked, mix in the chorizo sausage.


Remove the pan from the heat and allow everything to cool completely.
Once the filling has cooled, put a couple good-sized spoons of filling onto a small tortilla or wrap, Add some shredded cheese, then fold both sides in, and roll up.


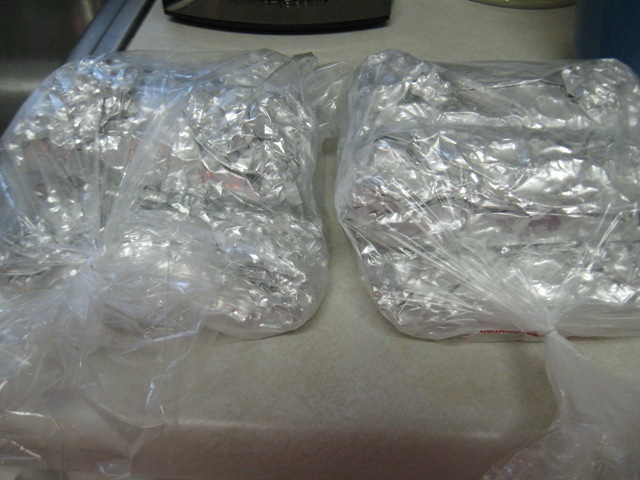
Wrap the burritos in saran wrap or foil, place in a freezer bag and store in the freezer until you're ready to eat them.


When you're ready to eat them, unwrap and place in the microwave or in the oven until heated through. If reheating in the oven, you can leave the foil on.......just not in the microwave!
You can also use leftover rice and add to this if you don't have potatoes, or anything else you might want in these. Really, there's no rules to this so make them with what YOU like!
As I said earlier, these are a big hit in my house, so I hope you'll give them a try sometime.
Thanks for stopping by!

  This post is part of the "On My Mind" feature over at Down To Earth.

Thursday, October 6, 2011

Tree Removal Day & Homemade Hamburger Buns

Today we're having a tree removed from our back yard that has grown up against the fence and causing a lot of damage. When we rented the house six months ago we talked about this tree, but at the time it wasn't pushing against the fence and we didn't think anything more about it. But now if we don't get rid of the tree, it'll eventually push over or break the fence, and could possibly damage the neighbor's side since they're both connected. We had contacted the real estate agents who manage the property and they sent out a man to look at the tree last night. At first he wasn't sure if he wanted to take out the whole tree, but after my husband talked to him I think he decided it was best. Anyhow, I'll know for sure when he gets here later this afternoon.
 You can see the damage that's already happened to the fence.

 Another angle.......

The fence used to stand up straight!

Funny how this tree wasn't touching the fence six months ago!

A look from the other side.......

I'll be glad to see this get fixed!

Last night for dinner we had sloppy joes and since I've been making all our bread, I made some hamburger buns using the bread recipe I posted recently. My husband asked if I could make the buns a bit smaller this time, and he said these were the perfect size!


I ended up with 22 buns all together and might have gotten a few more, but since I hand roll these I know some of them were a bit smaller and didn't rise as much as the others but that's ok. Everyone loved them and in this house they definitely won't go to waste! The extras were put in bread bags, labeled, and put in the freezer until I need them for another meal, along with the loaves of bread I made a few days ago.
It's amazing how homemade bread can bring a smile to everyone's face, so it makes me feel good that I can do this for my family. They certainly deserve it!  

This post is part of the "On My Mind" feature over at Down To Earth.

Monday, September 19, 2011

Our Son.......The Future Chef!

Last night our 14 year old son and aspiring chef, RJ, made dinner.......General Tso's Chicken, and it was delicious!
Ever since he was a little boy, RJ has always wanted to be a chef, saying he wanted to be just like Emeril Lagasse, who he watched faithfully on Food Network. As he's gotten older, Emeril is still a favorite, but RJ has a list of chefs he likes, including one I loved as a child growing up "The Galloping Gourmet", Graham Kerr. RJ's always had an interest in cooking and isn't afraid to experiment with food or want to try a recipe that's caught his eye, and he takes direction well which will help him later on when he goes to cooking school!
We went to the store to pick up a few items we didn't have on hand, and once we got home and the chicken was thawing, RJ got started on the marinade. Once the chicken thawed and he got it cut into small pieces he added it to the marinade, covered the bowl and put it in the fridge, then made the sauce to go over the chicken.
A few hours later my husband, Bill, got the oil heating up, and RJ got the eggs beaten and the breading ready for the chicken. Once the oil was ready, our 12 year old daughter, Megan, started breading the chicken for RJ. I cooked some of the chicken to get things going and showed him how long to cook it, then let him do the rest, reminding him to be very careful around that hot oil. Never hurts to repeat that.
Busy cooks!
Chicken cooking away!
Yum!
The sauce.......
Happy smiles! Nice job guys!
Our dinner!

We're so proud of RJ, and Megan for jumping right in to help him out. It's nice to see brothers and sisters working together and helping each other, but then they've always gotten along really well. Makes a proud mom smile!
I know RJ will make a great chef and maybe, just maybe.......we'll see him on the Food Network one day!


This post is part of the "On My Mind" feature over at Down To Earth.

Baking Bread

Working towards a more simple and self-sufficient life is one of those things you do one step at a time, and another small step in that direction was that I started baking bread again. One less thing on my grocery list!
I used to bake quite a bit, but when we moved last spring and life got hectic, it was awfully easy to just grab a couple loaves of bread at the store and come home, saving time and energy for other things. So yesterday I got out my bread pans, set up the mixer and laughed at the fact that my husband and my kids COULD NOT wait for the bread to get done!
The recipe I used, Country White Bread, comes from Gina at Home Joys and if you've never visited her blog, you really need to. Not only does she have a lot of great recipes and tutorials, but her blog is such a warm and inviting place as she talks about her life and devotion to God, her husband and their beautiful children. Truly.......a MUST read!
This recipe will give you three nice loaves of bread, which worked out great because I have the larger loaf pans for this, although it's just as easy to divide the dough between smaller pans if that's all you have.

Country White Bread

2 Tbsp. yeast
2 cups warm water
1/4 cup honey or sugar
1 Tbsp. salt
2 eggs, beaten
1/4 cup vegetable oil or soft butter
6 1/2 to 7 cups all-purpose flour

I mixed mine a little different than Gina did in her recipe, (I used my Kitchenaid mixer with a dough hook) but as in her directions, you can mix this in a large bowl. If you have a bread machine, you can use it to knead the dough as well. Whichever is easiest for you. Just a quick note.......if you do try this recipe please make sure you give Gina credit for it and link it back to her, and make sure you drop her a note on her blog and tell her how wonderful it is.
In a measuring cup, add 2 cups lukewarm water and the sugar or honey. Stir until dissolved, then add the yeast. Set aside and allow to yeast to activate and get bubbly, about 10-15 minutes.
While waiting on the yeast,  put the salt, eggs, oil, and 3 cups of flour into the mixer bowl. Turn on low speed and add the yeast. Once the flour has mostly been incorporated into the wet ingredients, turn up to medium speed, stopping once in a while to scrape the sides and bottom of the bowl with a spatula. 
Now is the time to start adding the remaining flour, a little at a time until you have a soft dough. Of the 7 cups of flour I started out with, I think I had about a cup or so left but that's ok. You may not need it all.
Put the dough into a bowl with a bit of vegetable oil making sure the dough is evenly coated, cover with plastic wrap and a warm towel and let rise until doubled, about 1 hour.
Punch dough down and divide into 3 equal pieces. Roll the dough out, then roll up like a jelly roll, pinch ends and tuck under placing loaves in the pans seam side down. 
Let dough rise until doubled, bake in a pre-heated 375 degree oven for 25-30 minutes (mine was done in 20 minutes). Remove pans from oven and allow to cool.
If making multiple loaves just slice each loaf, put in bags and store in the freezer. Make sure you write the date on the bag and what kind of bread it is.
 Finished bread!
First loaf sliced and ready for the freezer.......

Two of my loaves didn't raise quite as much as the third one did, and that might be because when I divided the dough they weren't exactly equal, but I wasn't disappointed at all with how they came out.
The bread wasn't heavy or dense, but perfectly light and it sliced wonderfully without tearing or falling apart. 
It really made me feel good to make this bread for my family, and it gave me a great sense of accomplishment, too.
Thanks, Gina, for a wonderful recipe. My family says it's AWESOME bread! 

Wednesday, September 7, 2011

Homemade Chicken Noodle Soup

When my husband, Bill, and I were sitting out on the patio yesterday enjoying the quiet of the morning, the air was crisp and smelled of wet earth and leaves.......full of that typical autumn scent you can't seem to get enough of. I love being out in the back yard because it's so peaceful. I can sit there and watch the birds and listen to them sing all day, laugh at the hummingbirds chasing each other around the feeder, and sometimes in the evening we can hear the barred owls hooting back and forth to one another. It's just a nice place to be, and what better way to end the day than a big simmering pot of chicken noodle soup.
I really don't know how I came up with this recipe. I think it was just something I put together one day and it's been a family favorite ever since. I always laughed when the kids would come home from school because the minute they walked through the door, they KNEW what we were having for dinner and there were smiles all around!
This is another easy recipe, one you can fix as is, or maybe add some carrots, parsnips, or other root vegetables. It freezes well and that's a good thing because this makes a lot of soup!

Homemade Chicken Noodle Soup

1 large, or 2 small whole chickens
5 stalks of celery, diced
2 large cans of cream of chicken soup
1 large bag of extra wide egg noodles
garlic, powder or freshly minced
poultry seasoning
salt and pepper
dried parsley flakes

Remove the gizzards from inside the chicken (these you can freeze and save to use in making your own chicken stock later), rinse the chicken well. Place in a large stock pot and fill about 2/3 with water. Add a couple tablespoons each, garlic powder and poultry seasoning. Turn burner on high and bring to a boil, then turn down to medium/medium low and let simmer about 2 to 2 1/2 hours or until the meat begins to fall off the bones.
Remove the chicken from the pot to a platter to cool, making sure you get any small bones still left in the pot.
Add both cans of cream of chicken soup to the pot and whisk until no lumps remain, then add the diced celery.
Once the chicken has cooled enough to handle, pull the meat apart, then put it back into the pot. Add a couple more tablespoons of both garlic powder and poultry seasoning, 2 tablespoons of the dried parsley, and salt and pepper to taste.
Allow this to simmer until the celery is not quite soft, then add your egg noodles. Taste the soup every so often to adjust the seasonings. Once the noodles are done, turn off the burner and it's ready to serve!
I like saltine crackers with this, but you could just as easily make some corn bread or a have a nice loaf of crusty artisan bread on the side to pull apart and dip into the soup.
Give this a try because I promise that when it's windy and cold outside and you're chilled, this will definitely warm you up and life just can't get any better.
Enjoy!

This post is part of the "On My Mind" feature over at Down To Earth

Monday, August 22, 2011

Thinking Of Autumn

As we'll soon be heading into autumn and cooler weather, my thoughts turn to warm and hearty foods. Soups and stews are wonderful because there's nothing better to warm you up and I just love the way the house smells when there's a big pot of something simmering away on the stove.
This recipe is one I put together a while back and everyone in my family just loves it. The ingredients are easy to find, it's simple to throw together, inexpensive and just down right good! This also freezes well, so any leftovers can easily go into a container and saved for another meal.

Hearty Vegetarian Chili
1 large can of pureed or crushed tomatoes
2 cans dark red kidney beans, don't drain
2 cans black beans, don't drain
3 bell peppers---1 green, 1 red, 1 orange or yellow
1 tablespoon garlic powder, or fresh minced
1/4 teaspoon cayenne powder (optional)
1-2 tablespoons chili powder

Put the beans and tomatoes in a crock pot; cover, and turn on high.
While that's warming up, cut the bell peppers into bite-sized pieces and saute in a pan with a tablespoon of vegetable or olive oil. Season with a little salt; add the garlic, chili powder, and cayenne powder. Stir in well.
Once the peppers get some good color on them, remove from heat and add them to the crock pot. Stir.
Let this cook on high for about an hour, then turn down to low and cook for another 3 hours, stirring occasionally. Remember to taste as this cooks and the flavors are coming together, because you might want to add a little more seasoning, or leave as is.
Just a side note---if you want to add meat to this chili, brown it beforehand as you did with the bell peppers, then add to the crock pot. We've made this with and without meat and it's good either way.

 Enjoy!

Friday, August 19, 2011

Bread & Butter Pickles

One of my husband's favorite things is bread and butter pickles and I have to admit, this has to be the best recipe. I made just a small batch of these, as I always do with new recipes, and I will definitely be making these again and again. The pickles stay crunchy, the flavor is amazing and even if you don't care for onions, I think you will after this because they end up being mild and sweet so give this a try!

Bread & Butter Pickles

5 medium cucumbers cut into 5 mm slices
350g onions, sliced very thinly
green capsicum and red chili are optional
50g salt
350 ml cider or white wine vinegar
350g sugar 
2 level tablespoons mustard seed
2 level tablespoons celery seed
½ level teaspoon turmeric
¼ level teaspoon cayenne pepper


Slice the cucumbers, onions, capsicums and chili and place in a bowl, and salt and let stand for 3 hours. Drain, rinse under the cold tap and drain thoroughly. Bring the remaining ingredients to the boil in a stainless steel saucepan and then add the vegetables. Reduce the heat, bring just to the simmer and cook 2 minutes. Pour hot into sterilized jars, making sure the liquid covers the cucumbers and seal.
Recipe courtesy of Rhonda Hetzel  from her blog, Down To Earth 

Here's my first batch of bread and butter pickles! It was so hard to NOT want to eat all of them after the first taste test, but the jars did make it into the refrigerator and I did promise my husband I'd be making more.
I had never made pickles before this, but this was so easy and so my next project will be a batch of spicy, dill pickles and I'm really looking forward to that.
Thanks, Rhonda for sharing such a great recipe. These are just yummy! 


  This post is part of the "On My Mind" feature over at Down To Earth